> For the complete documentation index, see [llms.txt](https://sql101.aprogrammer.blog/llms.txt). Markdown versions of documentation pages are available by appending `.md` to page URLs; this page is available as [Markdown](https://sql101.aprogrammer.blog/environment_setup.md).
# Environment Setup
SQL အသုံးပြုဖို့အတွက် MySQL DBMS ကိုအသုံးပြုသွားကြပါမယ်။
ဒီ article မှာတော့ MySQL ကို Window, macOS, Linux system တွေမှာ installation လုပ်ဖို့အတွက် screenshots တွေနဲ့တကွ guide လုပ်ပေးသွားပါမယ်။
## Window
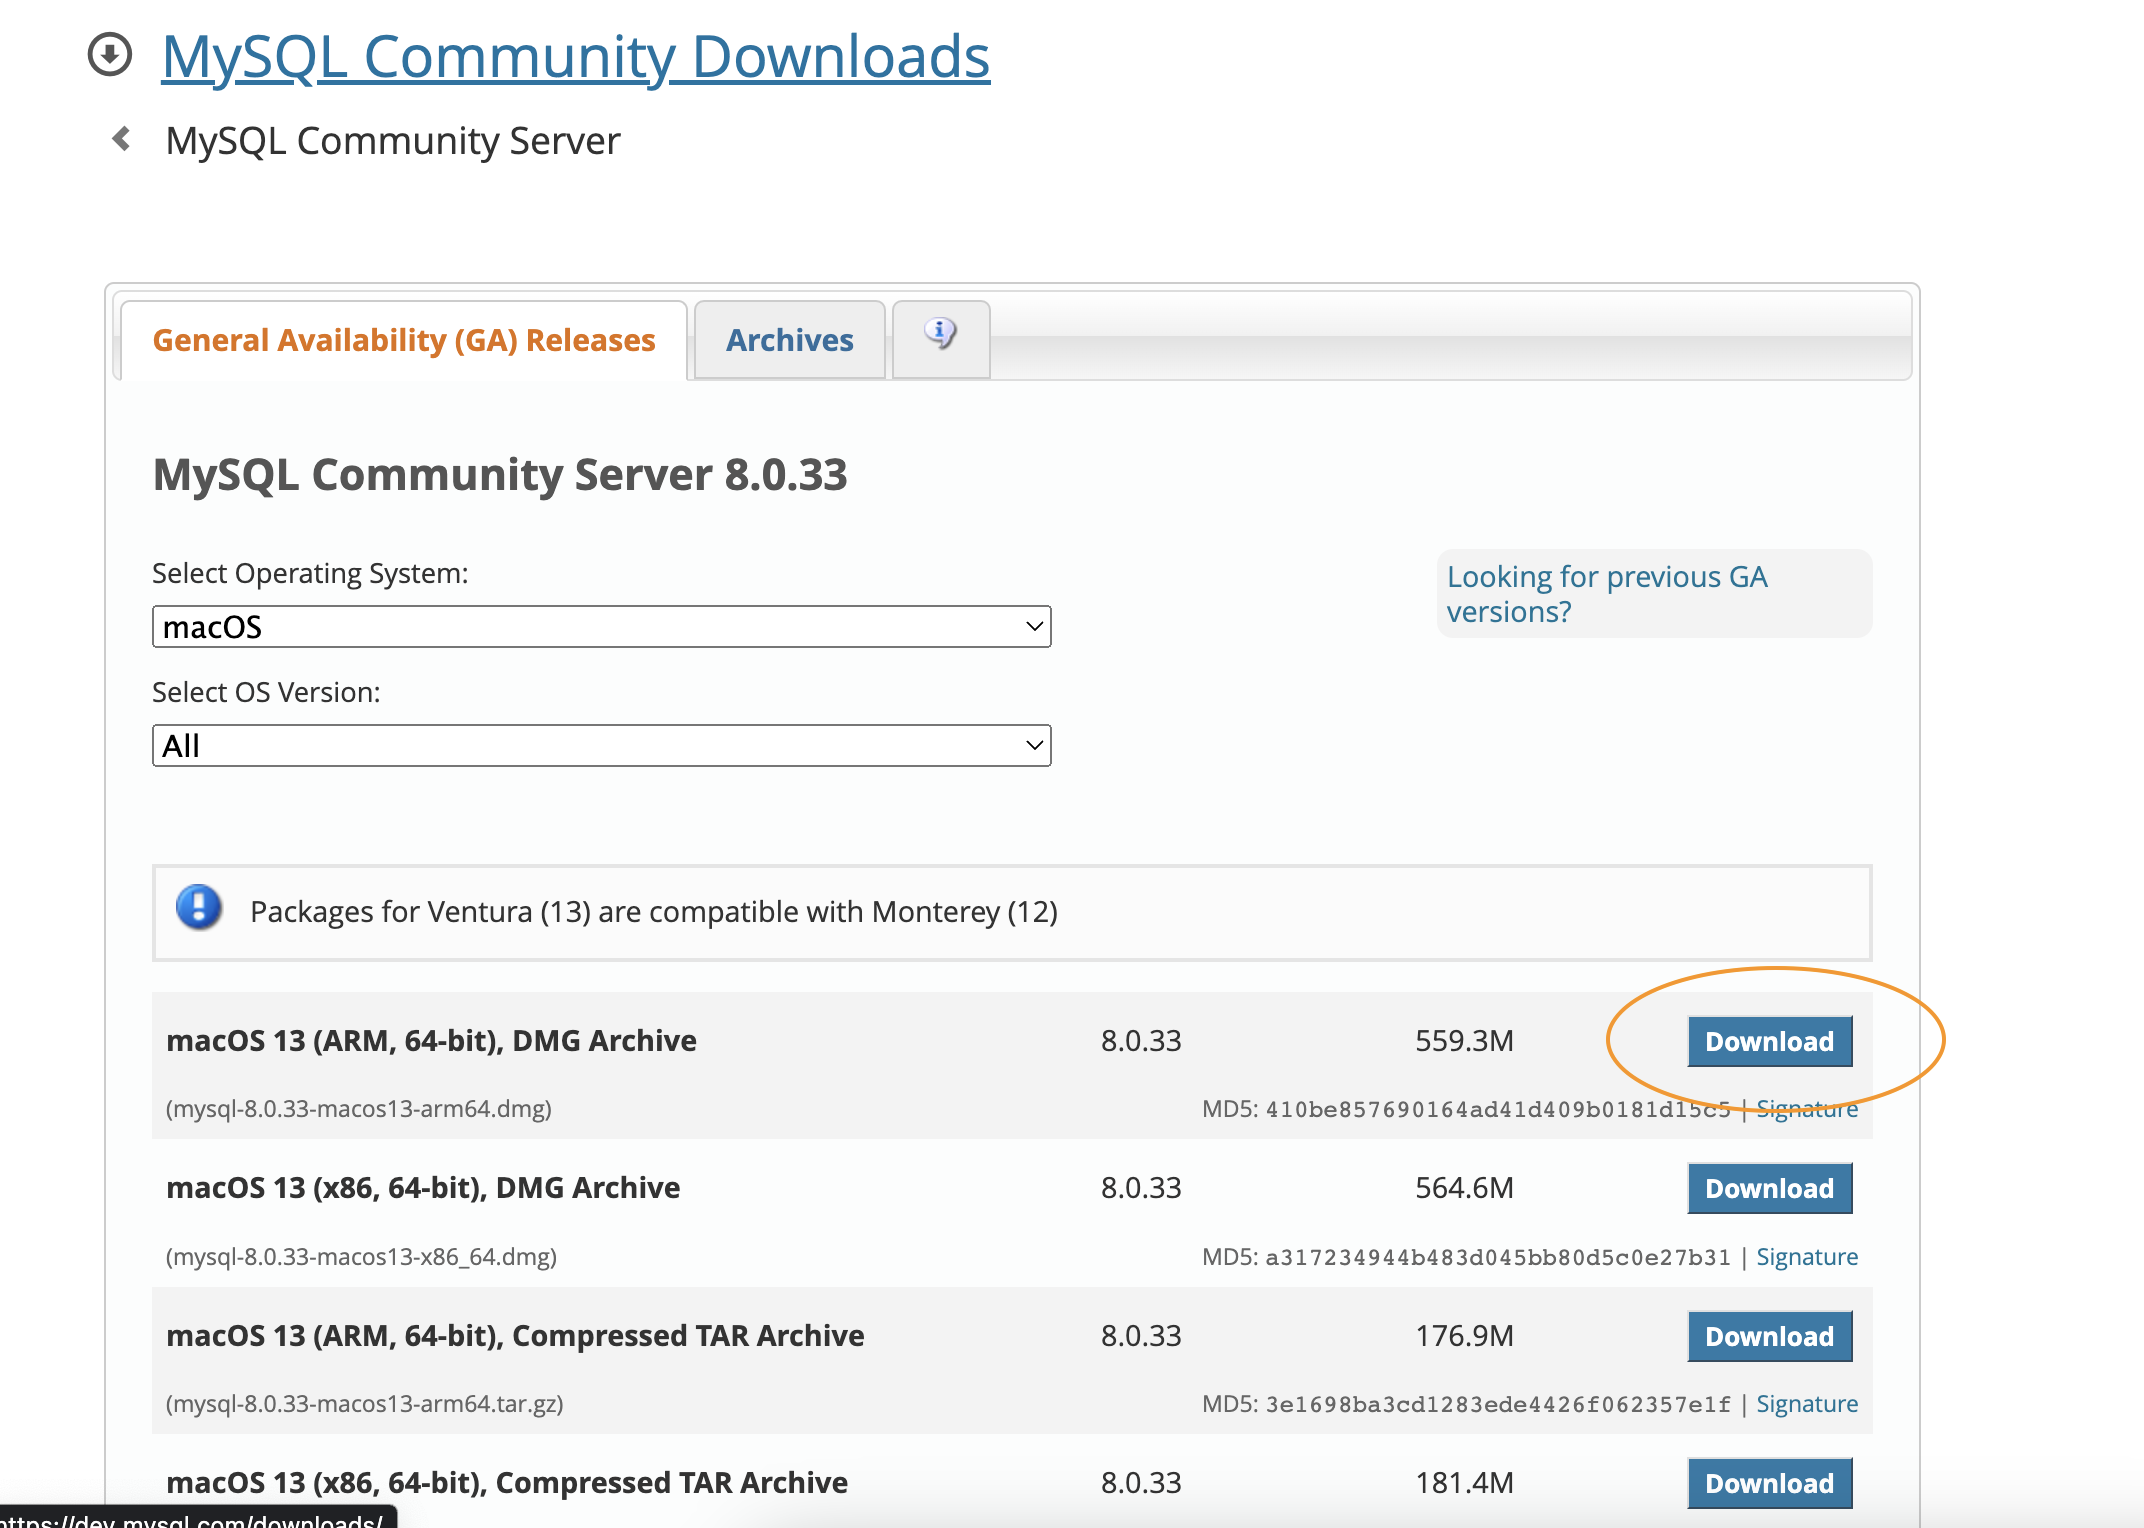
MySQL installation url ကိုသွားလိုက်ပါမယ်။
ကိုယ့် system နဲ့ကိုက်ညီတဲ့ download option ကိုရွေးပါ။
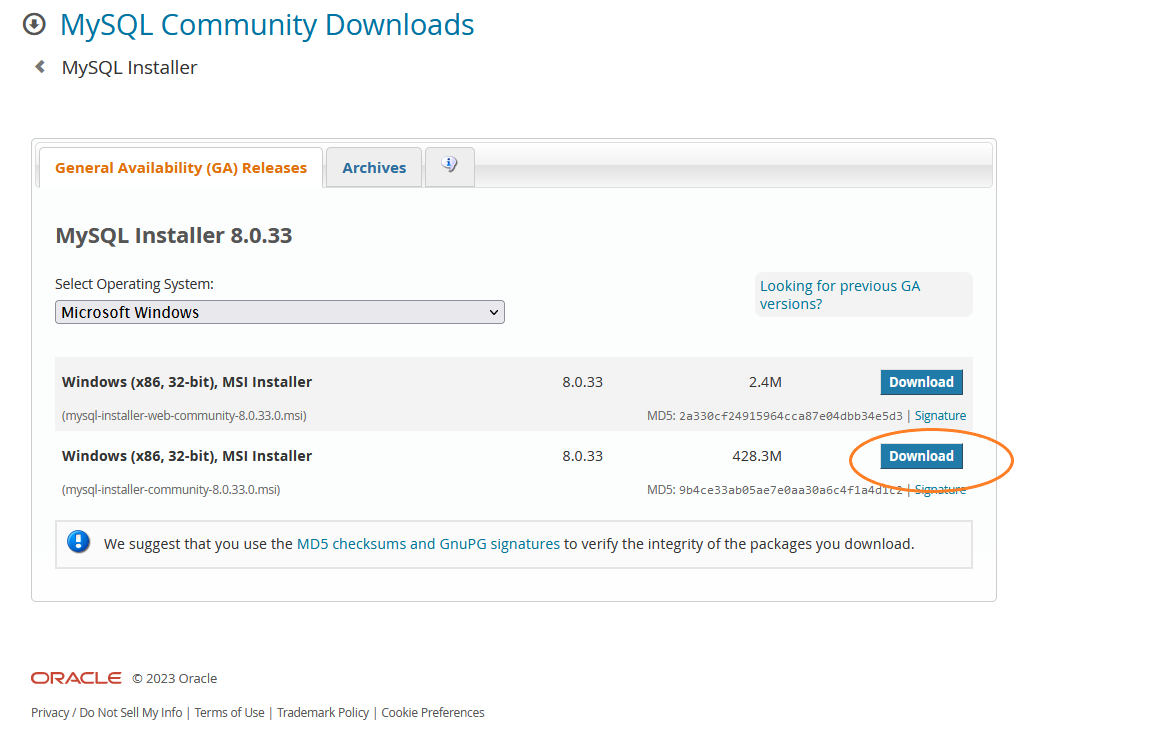
no thanks, just start my download ကိုနှိပ်ပြီး download ချပါမယ်။

exe file ကို double click လုပ်ပြီး installation ကိုစတင်ပါမယ်။
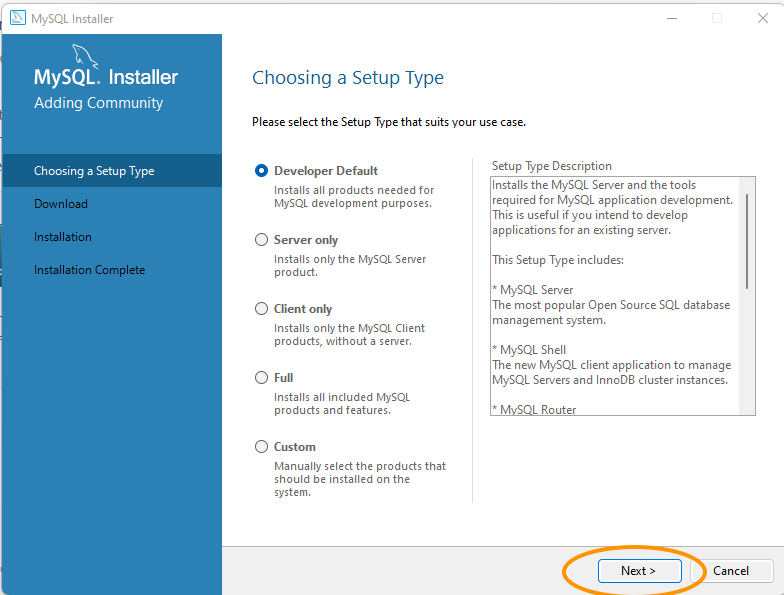
developer default ကိုရွေးပီး next နှိပ်ပါမယ်။
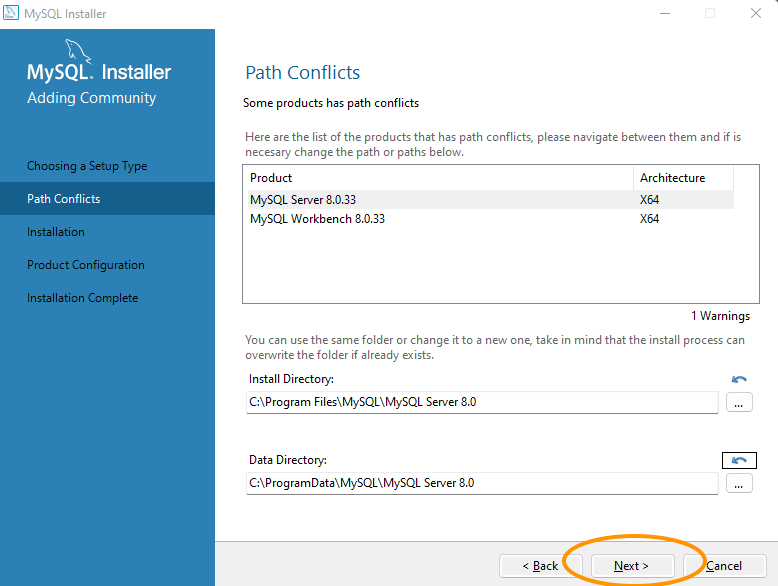
Path ကိုရွေးပြီး next နှိပ်ပါမယ်။
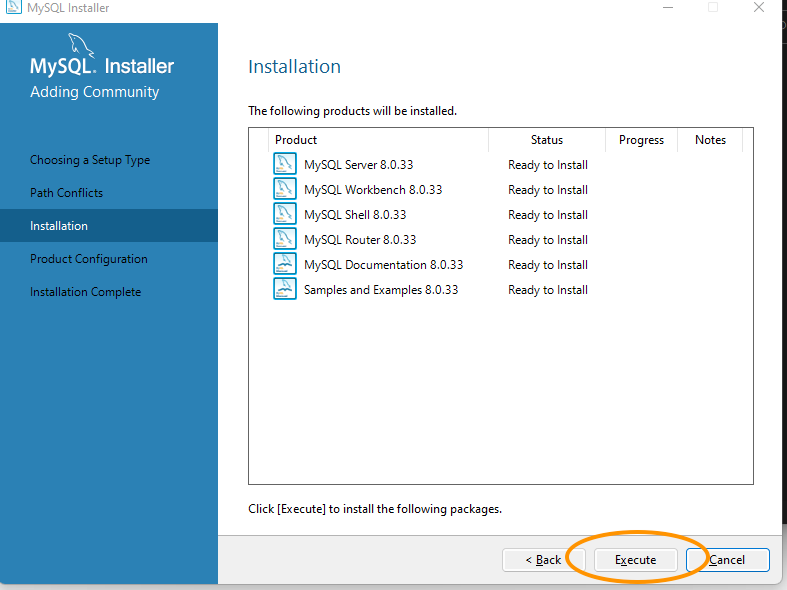
Execute ကိုနှိပ်ပြီး install စပါမယ်။
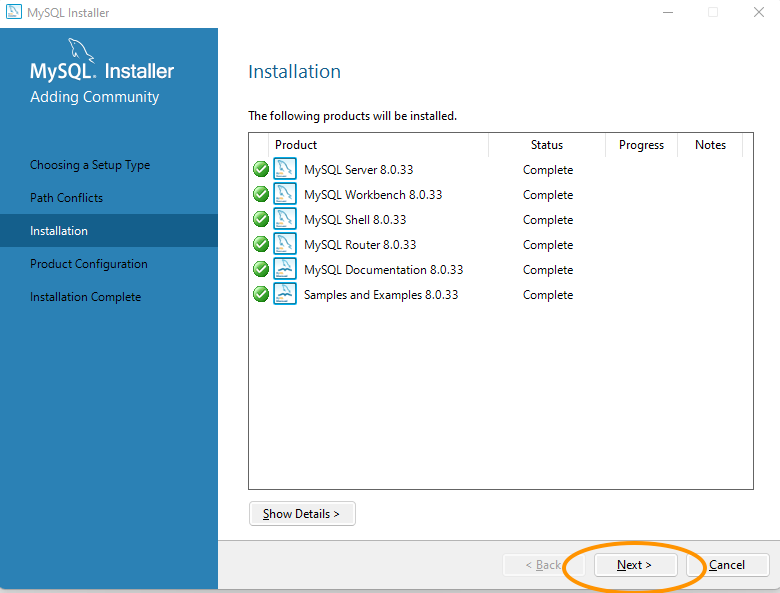
Next နှိပ်ပါမယ်။
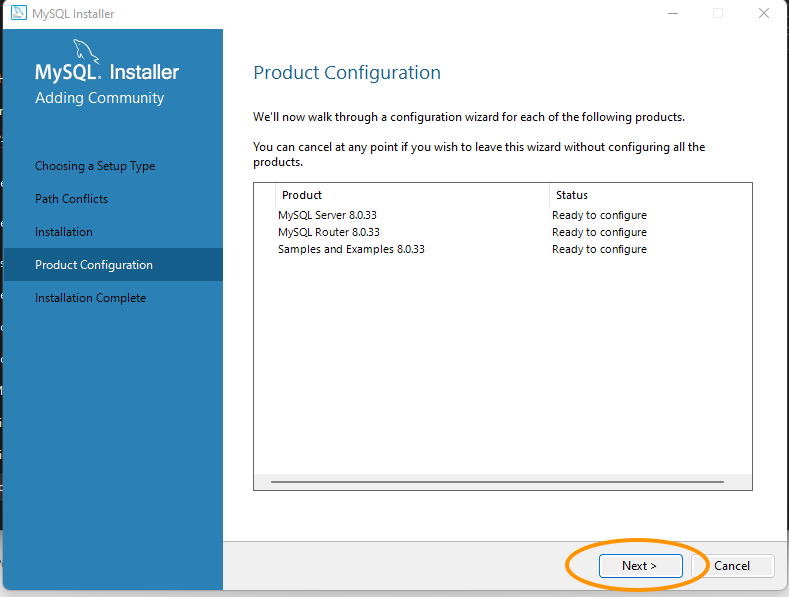
Next နှိပ်ပါမယ်။
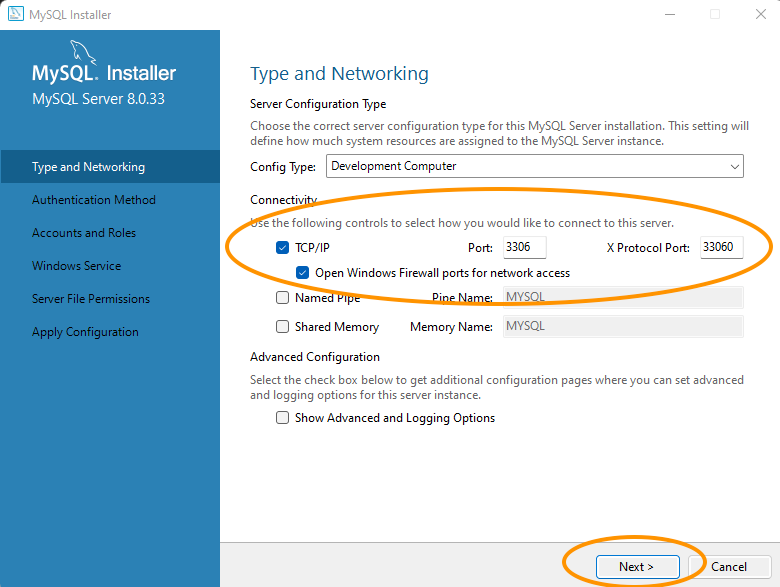
Setting ကိုစစ်ပြီး Next နှိပ်ပါမယ်။
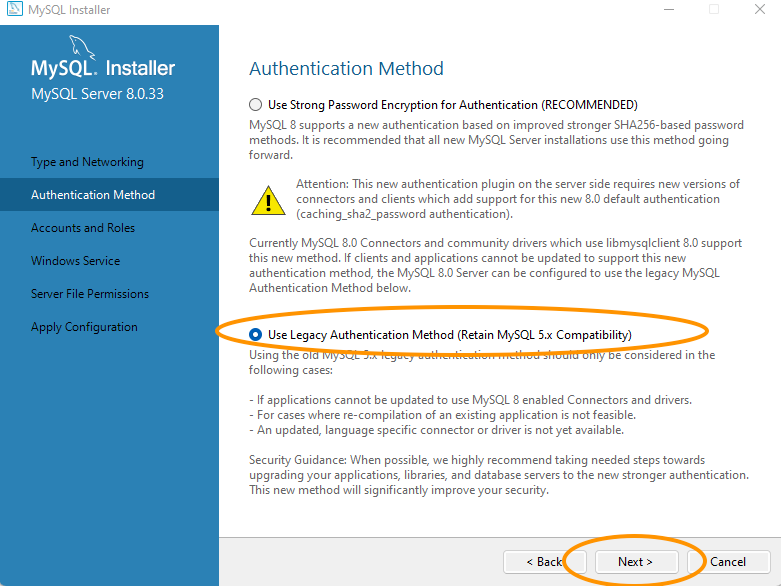
legacy authentication method ကိုရွေးပြီး Next နှိပ်ပါမယ်။ အကယ်လို့ local environment မဟုတ်ဘဲ production environment တွေမှာဆိုရင်တော့ strong password option မျိုးကိုရွေးသင့်ပါတယ်။ local ကိုယ့်စက်ထဲမှာတော့ကြိုက်တာရွေးထည့်ထားနိုင်ပါတယ်။\
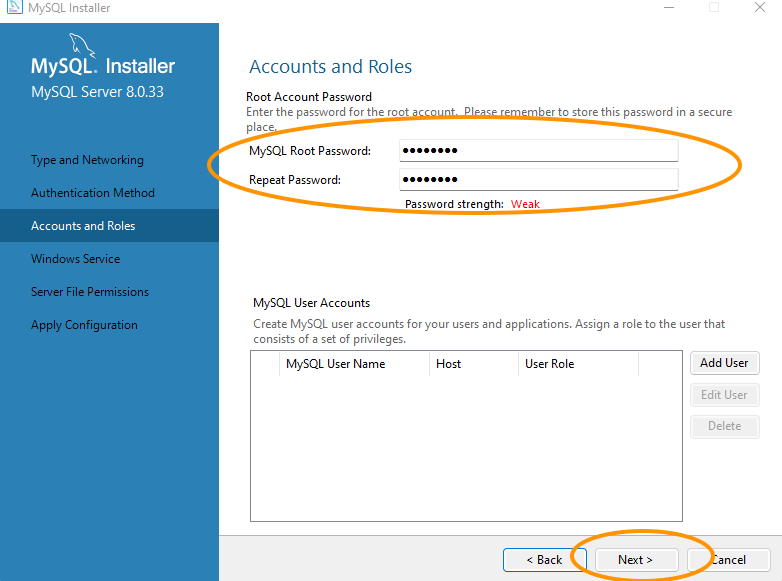
Password ထည့်ပြီး Next နှိပ်ပါမယ်။
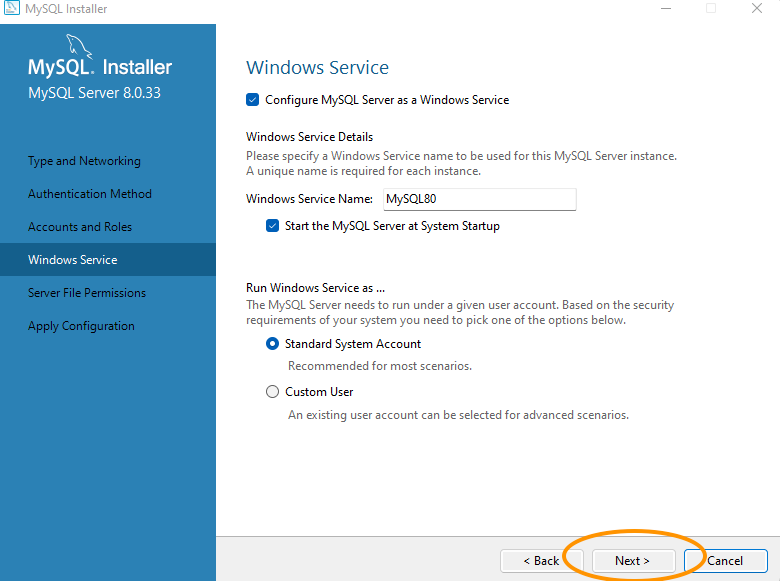
Next နှိပ်ပါမယ်။
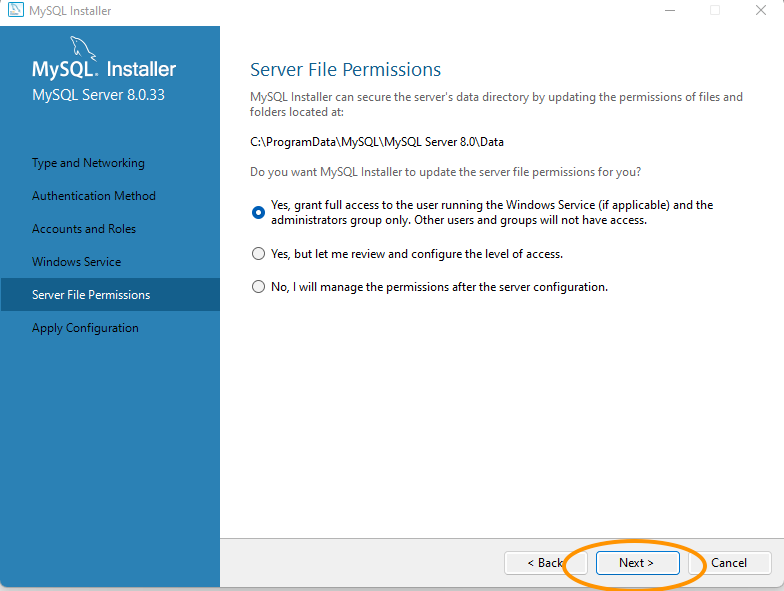
Full access grant လုပ်ပြီး Next နှိပ်ပါမယ်။
Configuration တွေ applyလုပ်ဖို့အတွက် execute ကိုနှိပ်ပါမယ်။

Finish ကိုနှိပ်ပါမယ်။

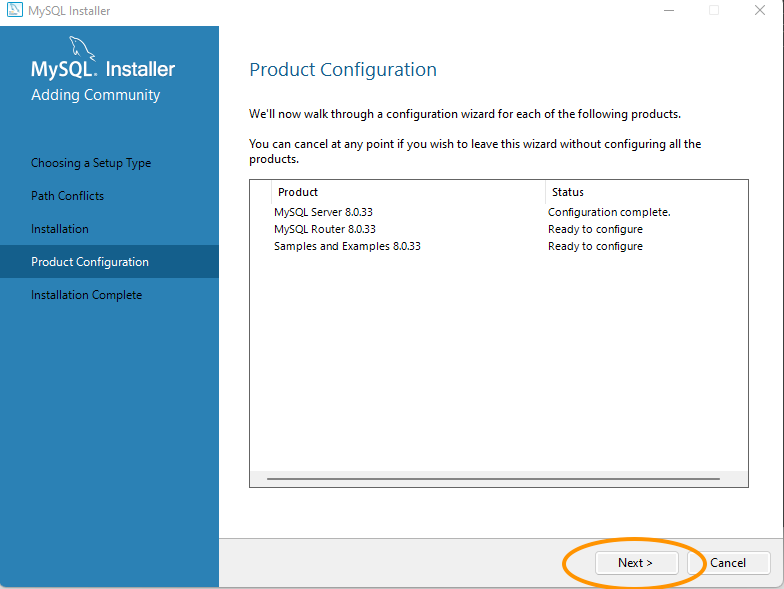
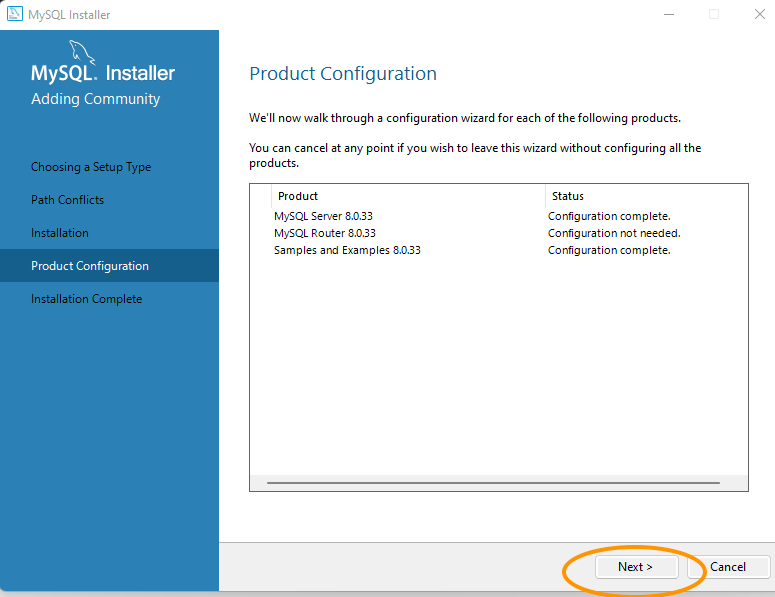
Product configurationsတွေထပ်လုပ်ဖို့အတွက် next ကိုနှိပ်ပါမယ်။
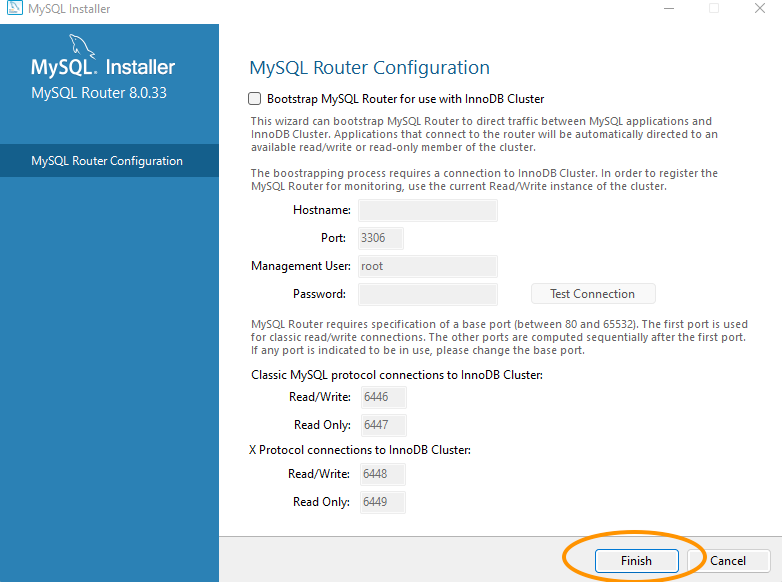
Finish ကိုနှိပ်ပါမယ်။
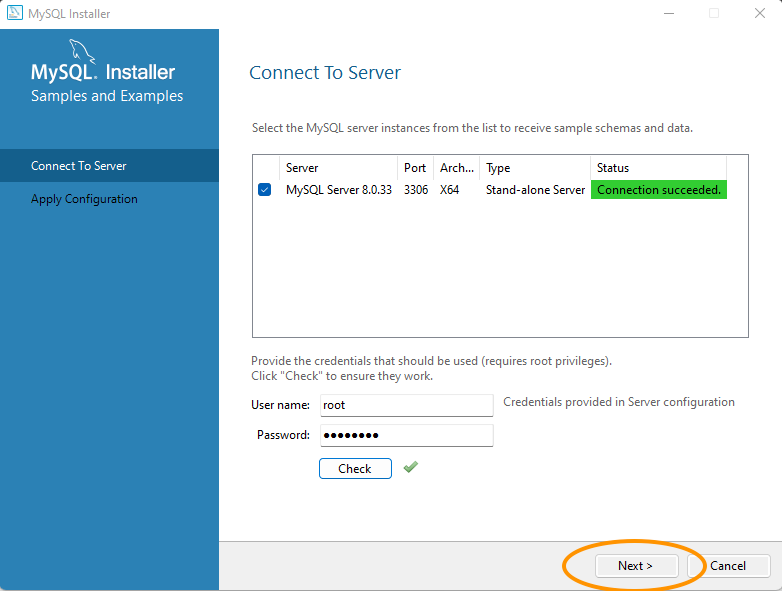
Samples configuration အတွက် next ကိုနှိပ်ပါမယ်။

Username, password ထည့်ပြီး check ကိုနှိပ်ပါမယ်။ အဆင်ပြေတယ်ဆိုရင် next ကိုနှိပ်ပါမယ်။
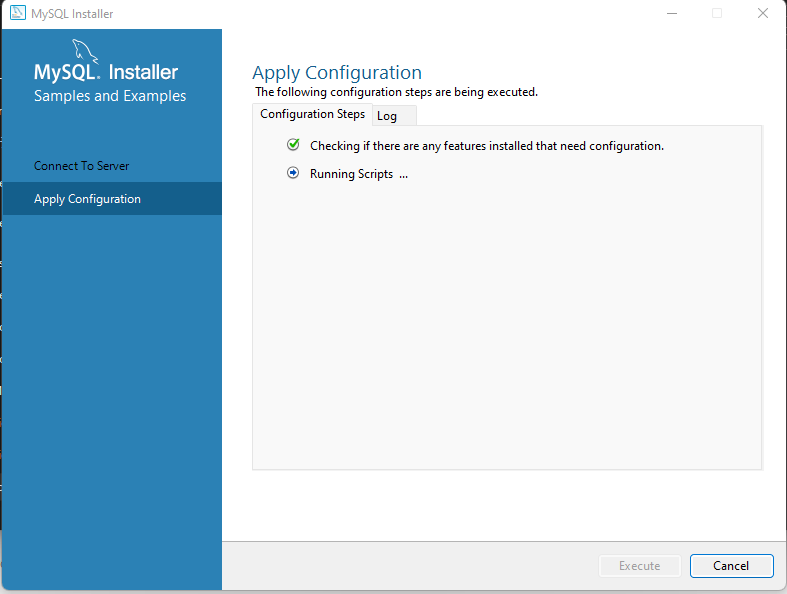
Setup ပြီးပါပြီ၊ next ကိုနှိပ်ပါမယ်။
\
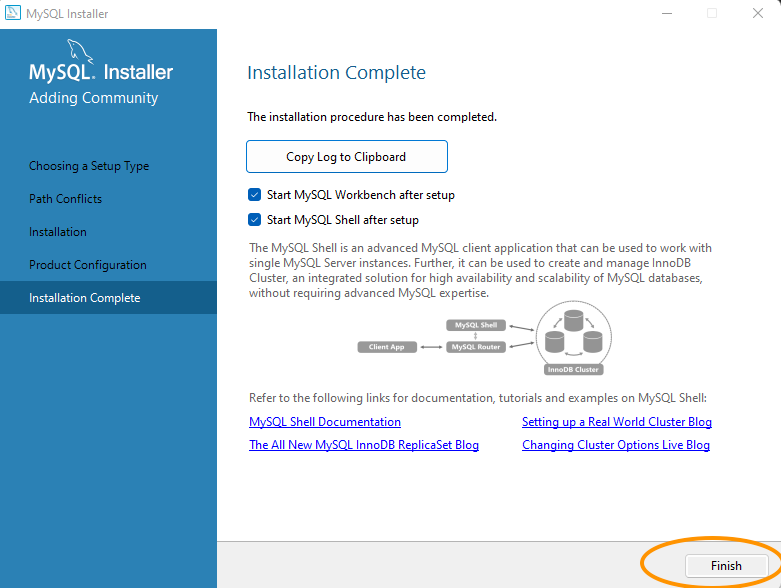
Finish ကိုနှိပ်ပါမယ်။
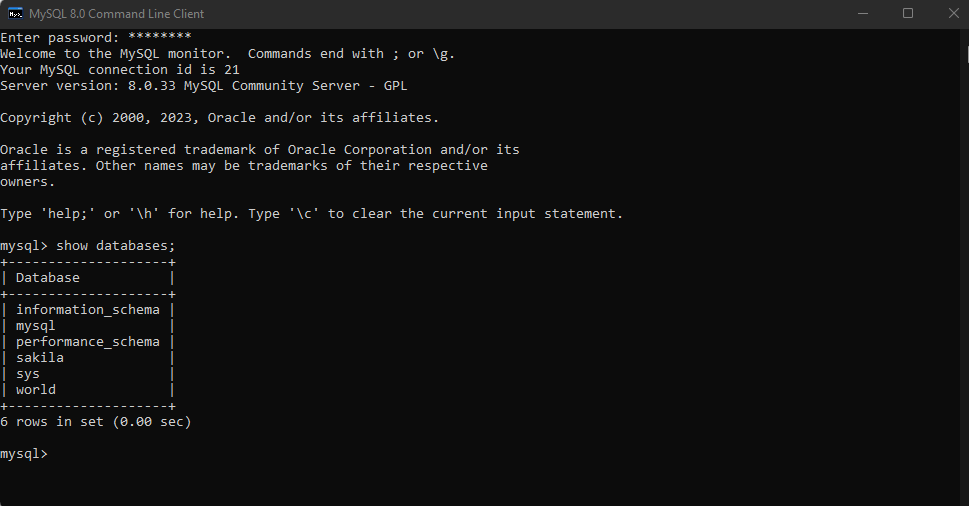
Start menu ကနေ MySQL 8.0 command line client ဆိုပြီးရိုက်ရှာပြီးဖွင့်လိုက်ပါမယ်။
အရှေ့မှာထည့်ခဲ့တဲ့ password ကိုဖြည့်လိုက်မယ်ဆို MySQL အသုံးပြုနိုင်ပါပြီ။
show databases လို့ရိုက်ကြည့်ပြီး database list ကို checkup လုပ်ကြည့်ထားနိုင်ပါတယ်။
## macOS
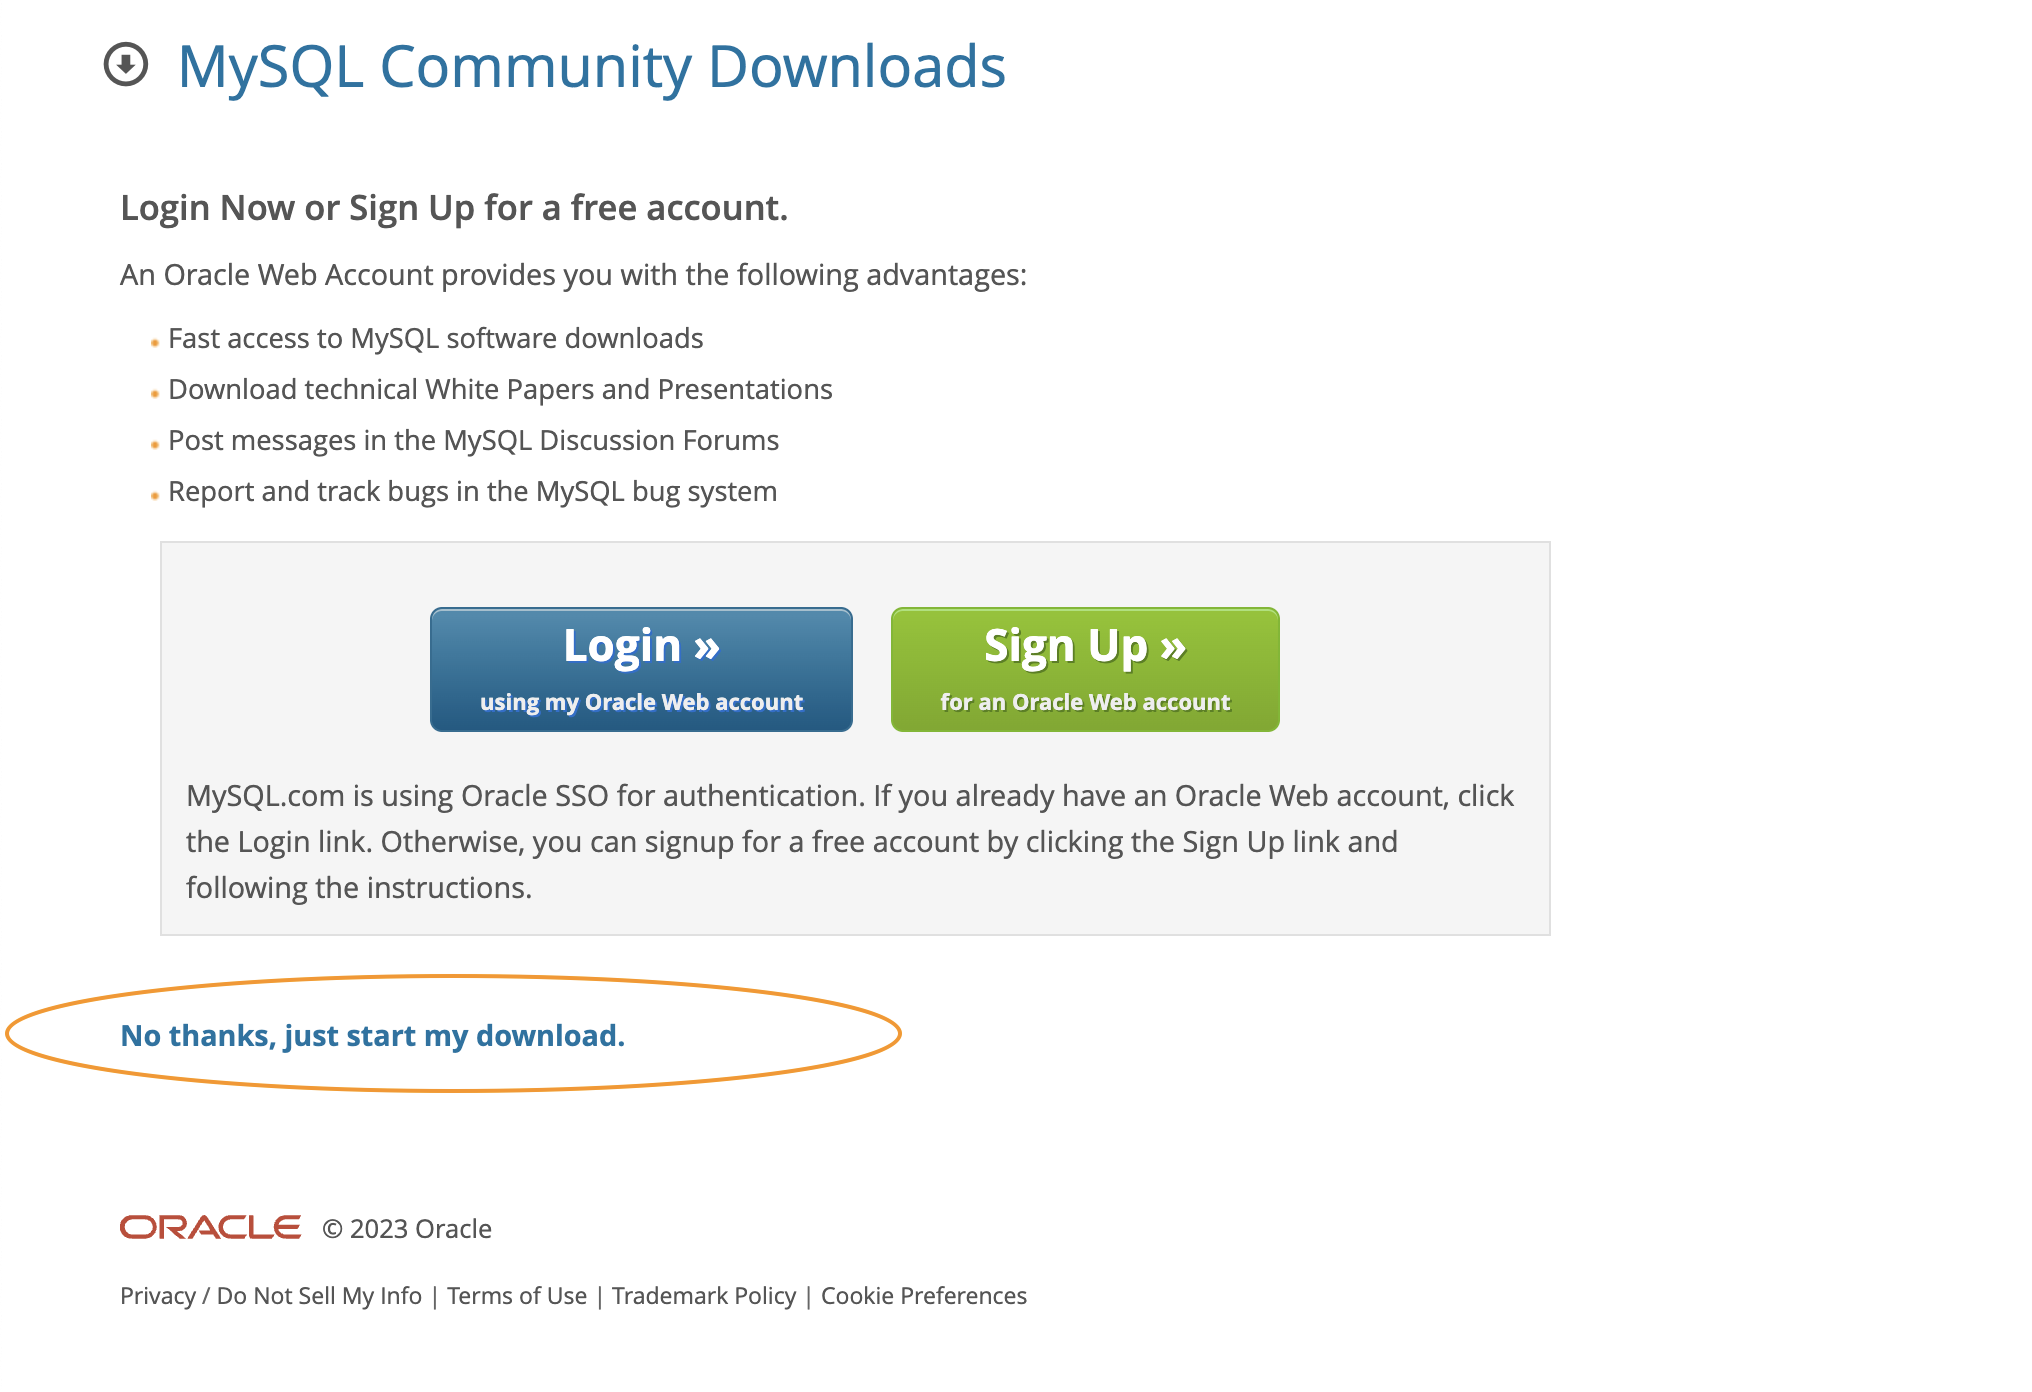
Download link ကနေမှတစ်ဆင့် macOS ကိုရွေးလိုက်ပါ။
ကိုယ့်ရဲ့ macOS system ကိုအောက်ပါအတိုင်းစစ်နိုင်ပါတယ်။
apple icon ကနေမှ about this mac ကိုရွေး System Report ကိုနှိပ်လိုက်မယ်ဆို system report ကိုမြင်ရမှာဖြစ်ပါတယ်။
no thanks, just start my download ကိုနှိပ်ပြီး installer ကို download ချနိုင်ပါတယ်။
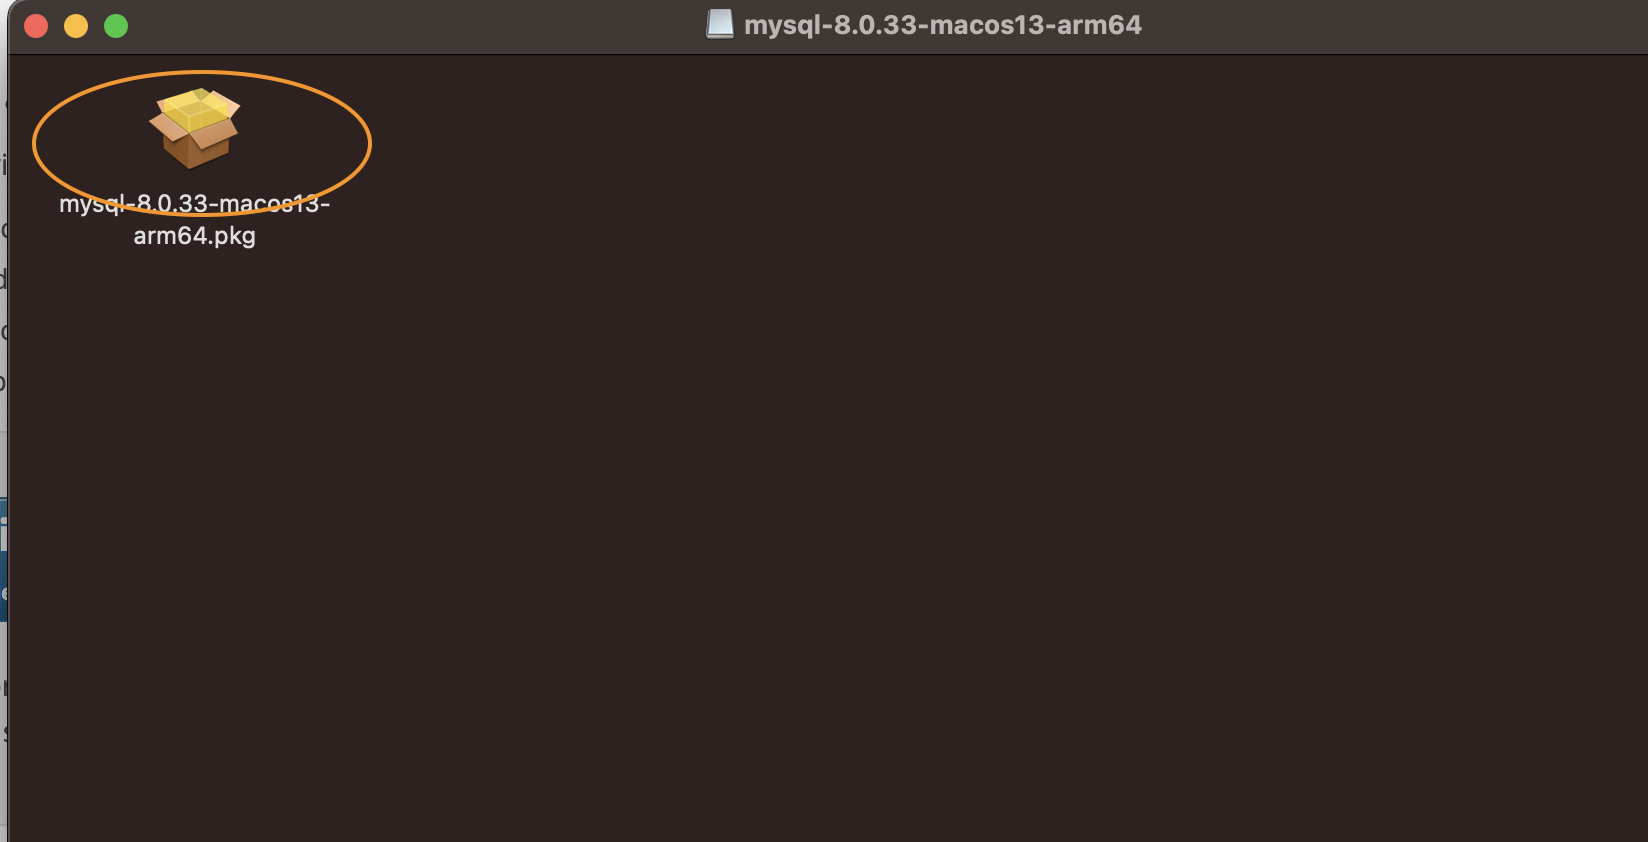
Double click လုပ်ပြီး installation ကိုစတင်ပါမယ်။
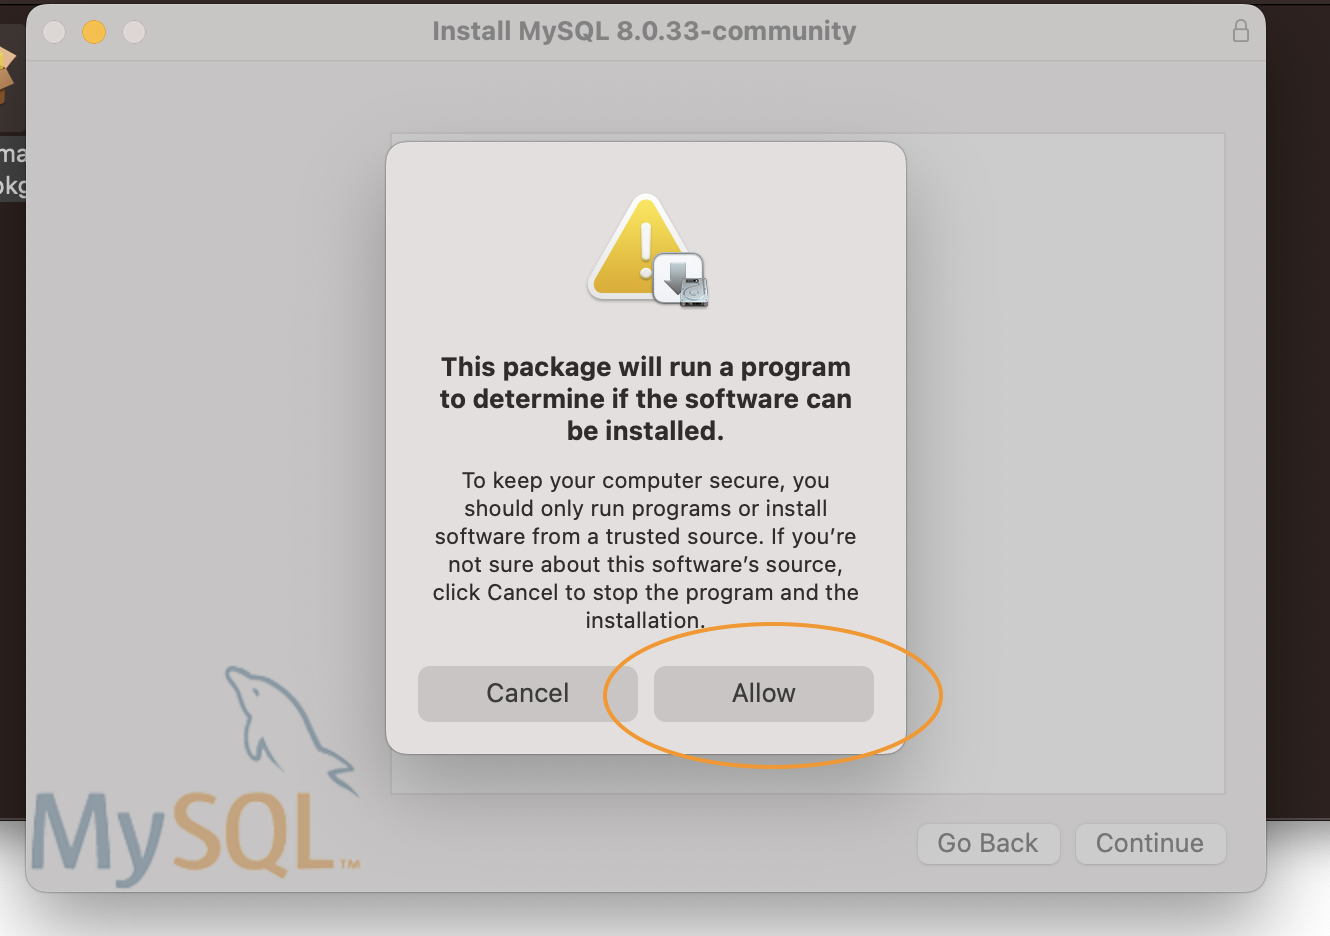
Allow ကိုနှိပ်ပါမယ်။
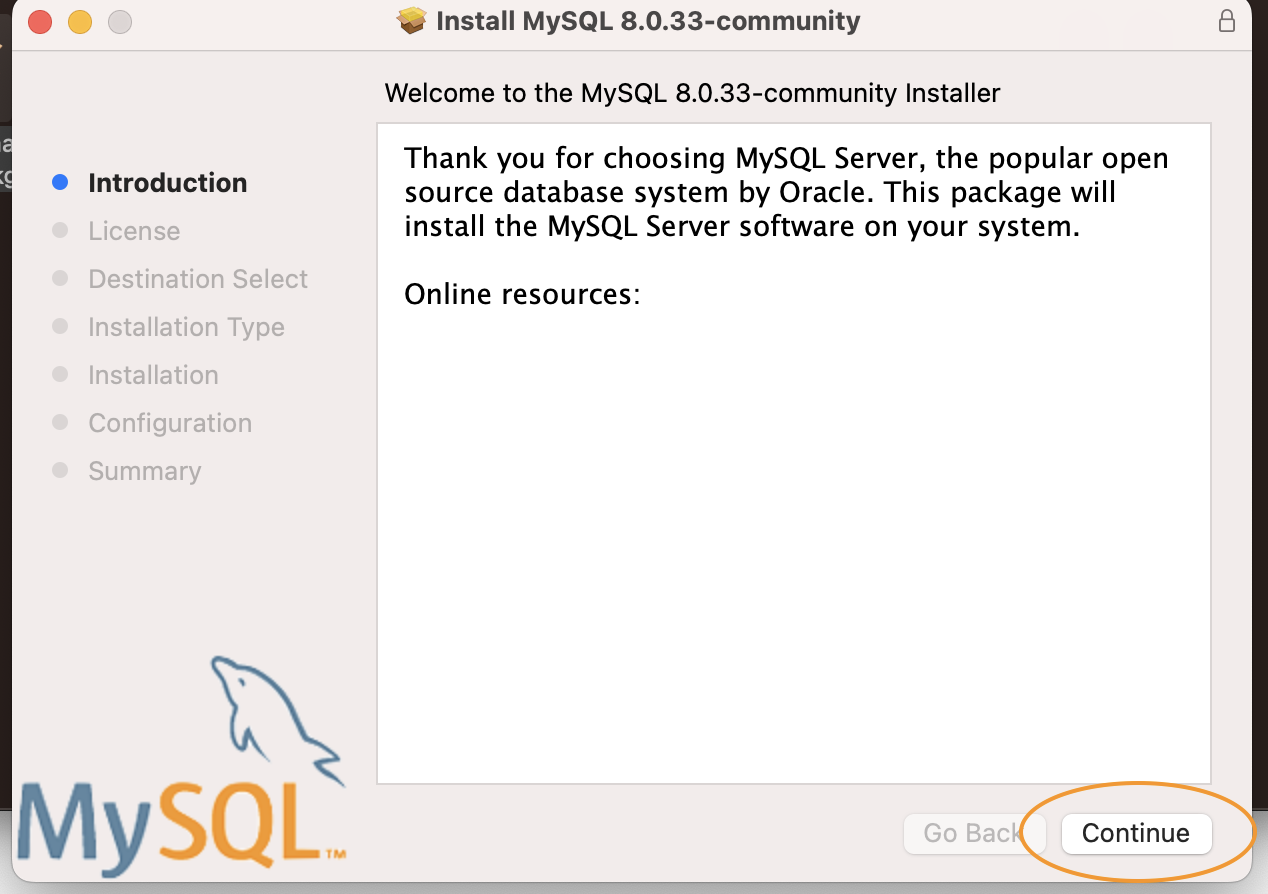
Continue ကိုနှိပ်ပါမယ်။
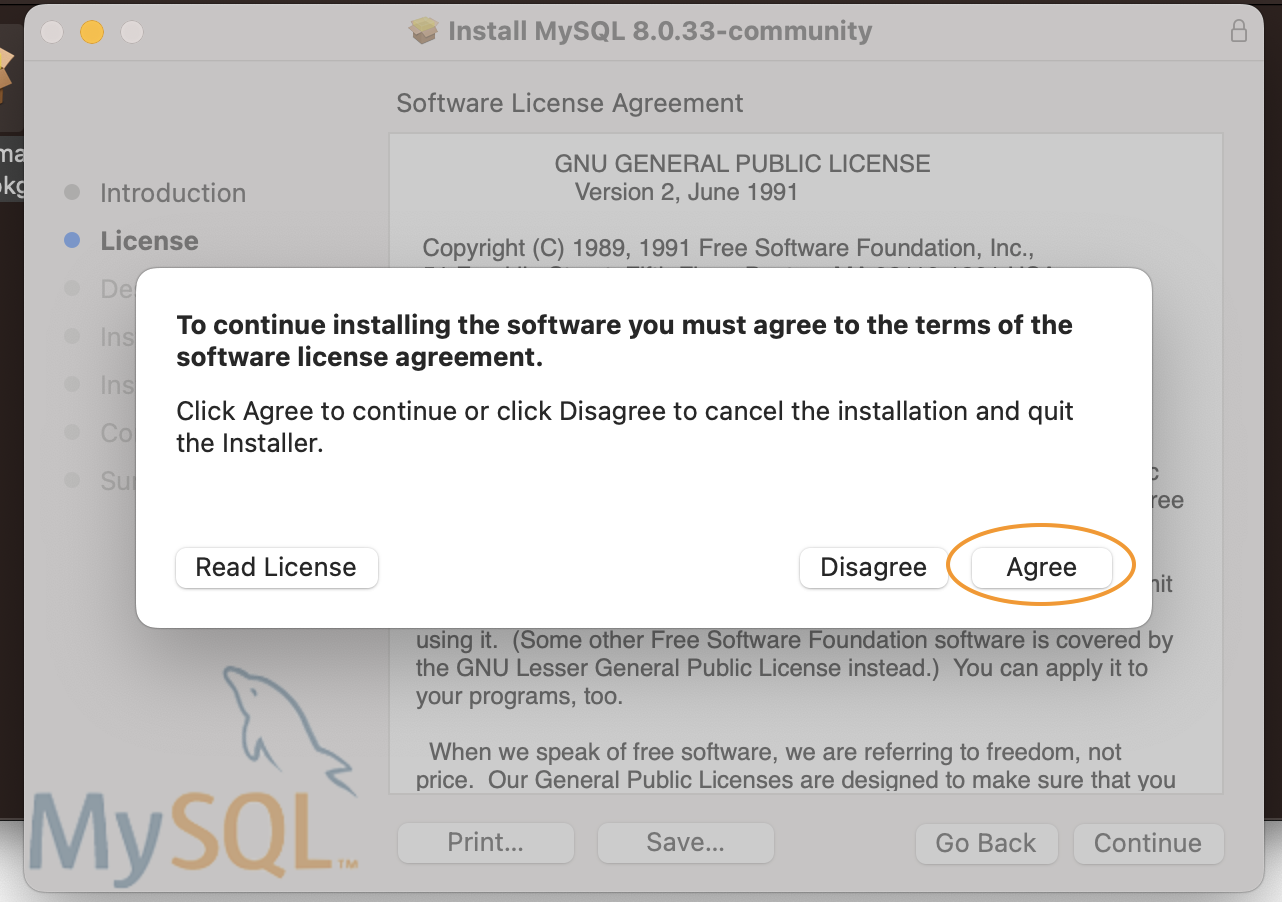
License agree လုပ်ပါမယ်။
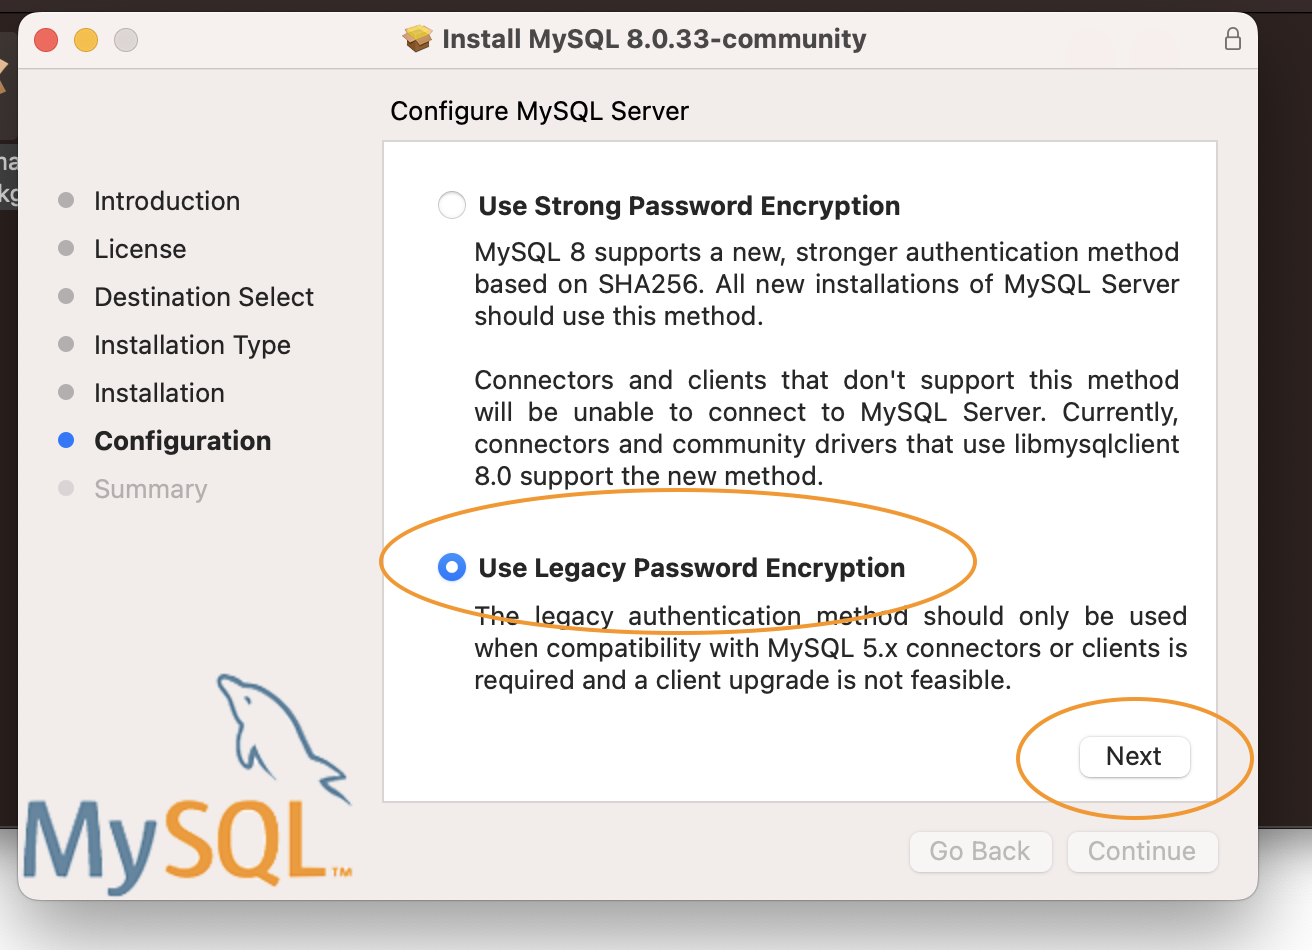
use legacy password ကိုရွေးပြီး next ကိုနှိပ်ပါမယ်။ local environment ကိုယ့်စက်ထဲမှာတော့ကြိုက်တာရွေးနိုင်ပေမယ့် production environment လိုမျိုးမှာ strong password option မျိုးကိုရွေးသင့်ပါတယ်။
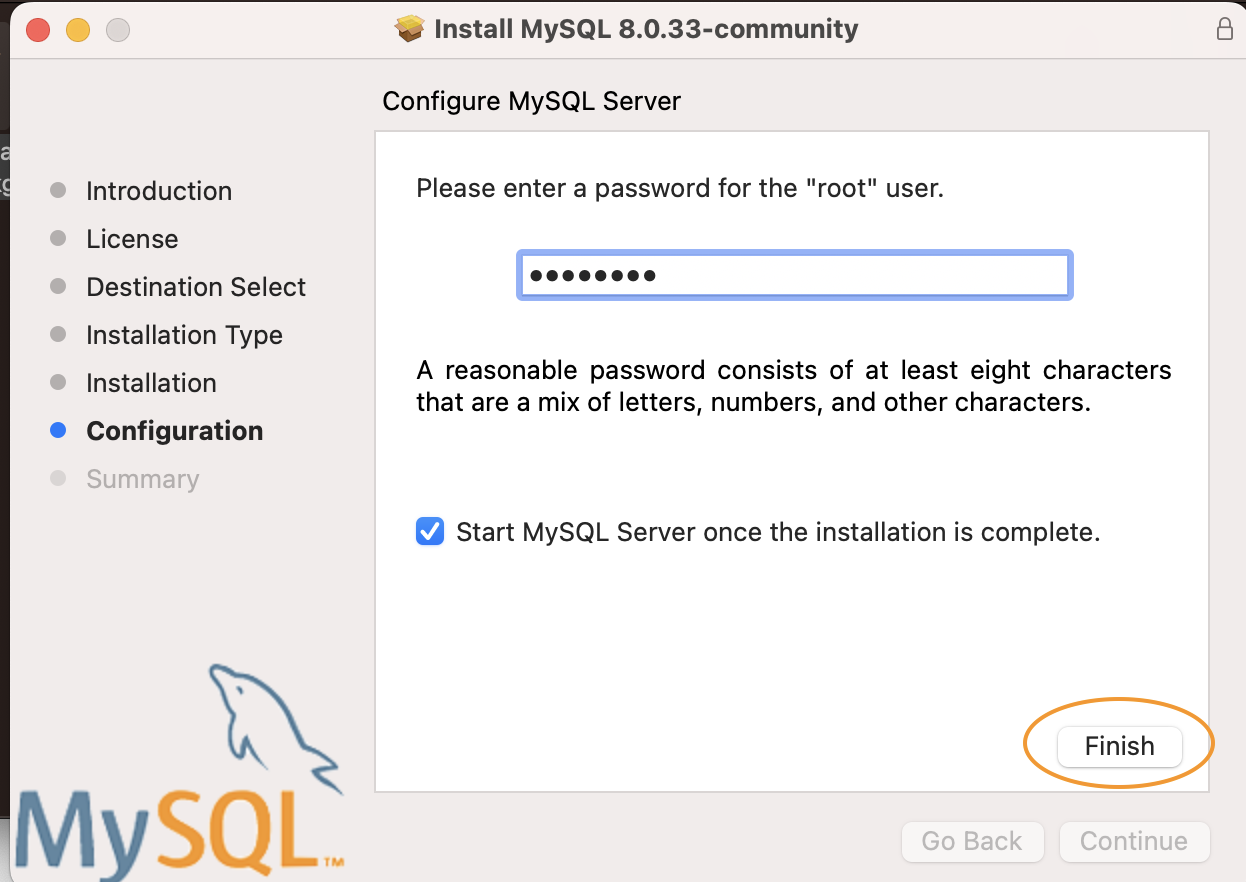
Password ရိုက်ထည့်ပါ။
Installation ပြီးပါပြီ၊ close ကိုနှိပ်ပါမယ်။

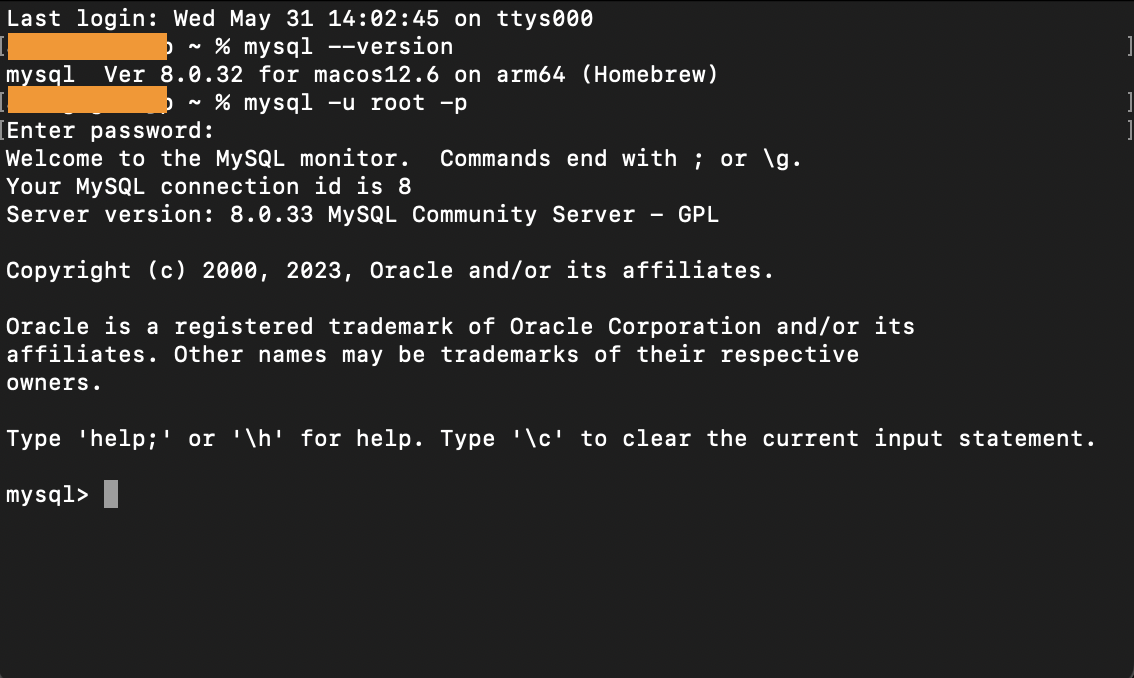
Terminal ဖွင့်ပြီး
`mysql –-version`
လို့ရိုက်ကြည့်လိုက်မယ်ဆို MySQL version ကိုမြင်ရပါမယ်။
`mysql -u root -p`
ရိုက်ပြီး MySQL ကို login ဝင်ကြည့်ပါမယ်။
Password ရိုက်ထည့်လိုက်မယ်ဆို MySQL အသုံးပြုနိုင်ပါပြီ။
## Linux
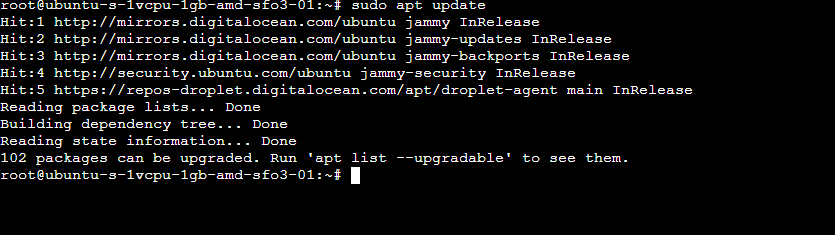
Packages list ကိုအရင် update လုပ်ပါမယ်။
`sudo apt update`
mysql-server သွင်းပါမယ်။
`sudo apt install mysql-server`

သွင်းပြီးတဲ့အခါ MySQL version ကိုစစ်ကြည့်ပါမယ်။ version ပေါ်လာရင်သွင်းတာအောင်မြင်ပါတယ်။
`mysql --version`

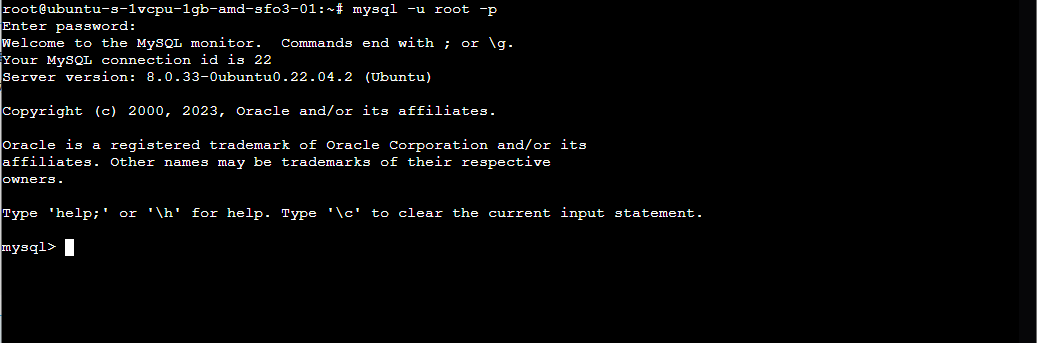
MySQL ကို login ဝင်ကြည့်ပါမယ်။ လောလောဆယ်တော့ password မရှိသေးတော့ ဒီအတိုင်းဝင်သွားပါလိမ့်မယ်။
`mysql -uroot`

MySQL shell ထဲရောက်ပါပြီ။ password ထည့်ပါမယ်။
Password ကိုတော့ ‘password’ လို့ပဲပေးလိုက်ပါတယ်၊ ကြိုက်တာပေးလို့ရပါတယ်၊ ၈လုံးတော့ရှိဖို့လိုပါတယ်။
`ALTER USER 'root'@'localhost' IDENTIFIED WITH mysql_native_password by 'password'`

MySQL shell ထဲကနေ `exit` လို့ရိုက်ပြီးထွက်လိုက်ပါတယ်။
`mysql -u root -p`
လို့ရိုက်ပြီး password အသစ်နဲ့ Login ပြန်ဝင်ကြည့်ပါမယ်။
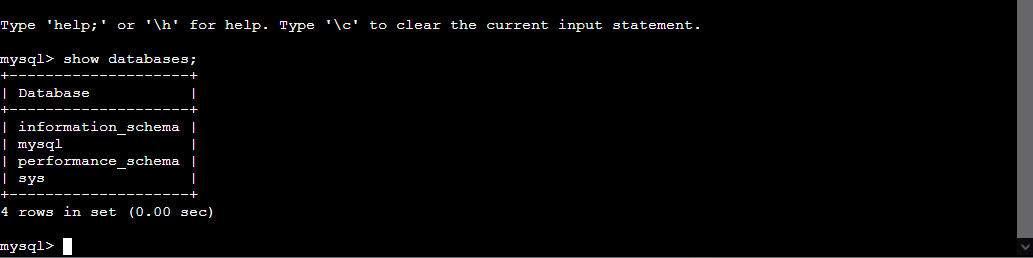
`show databases` လို့ရိုက်ပြီး database list check လုပ်ကြည့်ပါမယ်။
---
# Agent Instructions
This documentation is published with GitBook. GitBook is the documentation platform designed so that both humans and AI agents can read, navigate, and reason over technical content effectively. Learn more at gitbook.com.
## Querying This Documentation
If you need additional information that is not directly available in this page, you can query the documentation dynamically by asking a question.
Perform an HTTP GET request on the current page URL with the `ask` query parameter:
```
GET https://sql101.aprogrammer.blog/environment_setup.md?ask=
```
The question should be specific, self-contained, and written in natural language.
The response will contain a direct answer to the question and relevant excerpts and sources from the documentation.
Use this mechanism when the answer is not explicitly present in the current page, you need clarification or additional context, or you want to retrieve related documentation sections.